

Google considers SSL to be a positive ranking signal, and users feel safer when they see the padlock in their browser, so installing SSL on your Magento site is a must. I also recommend using it site-wide, since this is necessary to get the search engine rankings boost, and because it creates a greater feeling of trust with your consumers.
Most guides on the topic only tell you how to configure your URLs in Magento for SSL, but this is really just a small part of the process. You need to install a certificate before updating your URL structure as it makes a difference, and you need to check your site for errors, warnings, and SEO pitfalls during and after the process as well.
Let’s talk about how to get SSL up and running on your Magento site.
1. Generate Your Certificate Signing Request And Private Key
There are three important components that make SSL encryption work: a Certificate Signing Request, a Private Key, and a Public Key. You generate the Private Key and Certificate Signing Request simultaneously on your own servers, and keep the Private Key hidden, then give the Certificate Signing request to a Certificate Authority, where you purchase your SSL certificate.
The Certificate Authority uses your Certificate Signing Request to generate a Public Key. It’s this Public Key that’s used to encrypt the information so that third parties can’t read it. The Public Key can be used to encrypt information, but not decrypt it. Only your Private Key can decrypt the information, so it must be kept secret in order to preserve the integrity of SSL encryption.
So the first step is to generate your Certificate Signing Request and Private Key. The Private Key usually remains hidden during this process to preserve its secrecy.
Here’s how to generate them.
Using cPanel
Here I will assume that you are using the Paper Lantern cPanel theme, although the procedure is nearly identical if you are using the Legacy theme.
Here’s what you need to do:
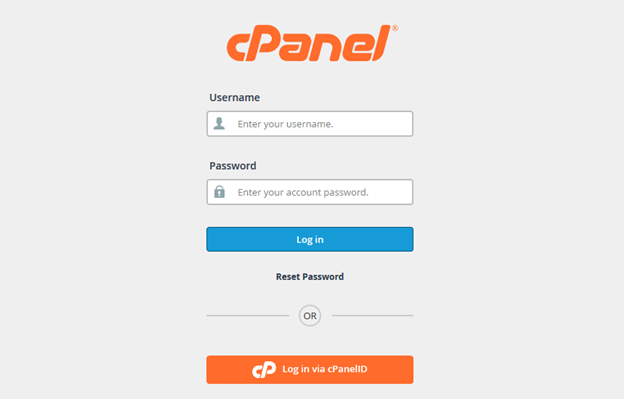
1. Log in to cPanel with your username and password.
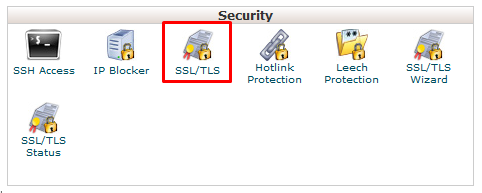
2. Scroll down to the “Security” section.
3. Click the “SSL/TLS” icon (it looks like a paper certificate)
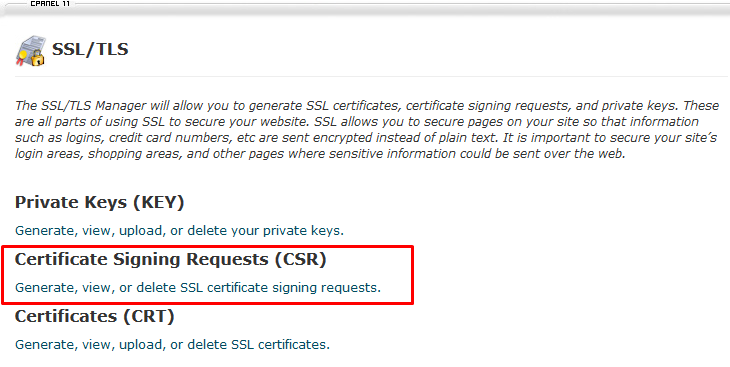
 4. On the SSL/TLS page, scroll to the “Certificate Signing Requests (CSR)” heading
5. Click on the “Generate, view, or delete SSL certificate signing requests” link
6. On this page, locate the heading that says “Generate a New Certificate Signing Request (CSR)”.
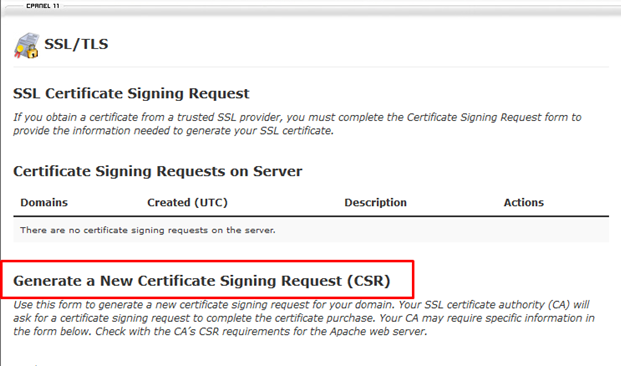
7. Below this, select “Generate a New 2048-bit key” so that a Private Key will be generated along with the CSR.
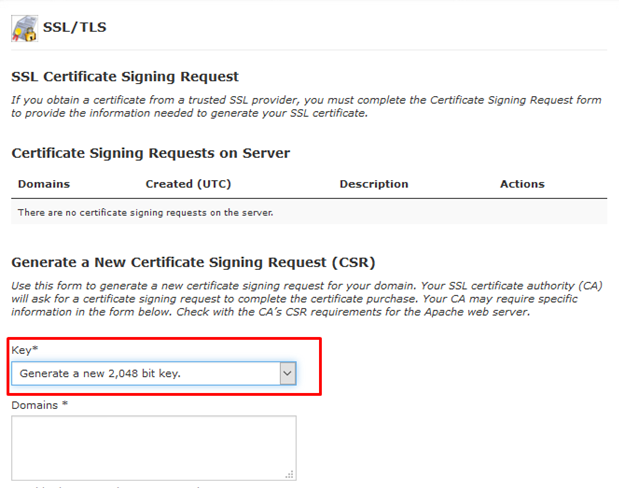
8. You will need to include information for all of the following:
- Domains: Enter your domain name here. Don’t include the http or www in your URL. If you plan to use more than one domain, enter in one domain per line. You can also use an asterisk as a wildcard in the URL. (If you don’t know what that means, you probably shouldn’t use one). Bear in mind that most Certificate Authorities will charge you more if you include a wildcard or more than one domain, so only include one unless you are prepared to do more.
- City and State: You’ll need to manually type these in. They should represent either your own personal location if you are solo, or the location of your business if you are incorporated.
- Country: Same as for city and state, except here you’ll need to select from a drop down.
- Company: Enter your legally-registered company name here if you have one and you plan to purchase an “Organization Validation” or “Extended Validation” SSL certificate. If you are flying solo or only want to purchase a “Domain Validation” SSL certificate (which are generally cheaper), you can enter “NA” here.
- Company Division: This is for the department of your company that will be purchasing the certificate. If you will be buying a “Domain Validation” certificate, you can enter “NA.”
- E-Mail: You can enter your e-mail here, although most Certificate Authorities won’t need it and it is acceptable to leave this blank.
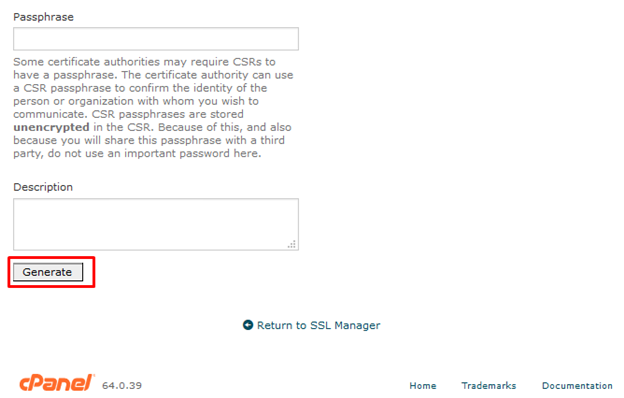
- Passphrase: This field was once included as a supposed way to further verify your identity, but it is now considered obsolete by most Certificate Authorities, and you can leave it blank (and probably should if you are tempted to use a password here that you use for other things).
- Description: You can include information here such as keyphrases that will make it easier for you to search for your CSR in the future, especially if you start generating more of them.
9. After populating all of these fields, click the “Generate” button.
10. The next page will say “Generated Certificate Signing Request” and your CSR code will be included in the box under the “Encoded Certificate Signing Request” heading.

Make a copy of the CSR code and save it for your records. You will need this code when you buy your SSL certificate. The Private Key has also been generated on your server and is tied to this CSR, but it is not visible and you should not need to find it in order to complete the procedure.
Using Your Server Command Line
If you are running an Apache or Nginx server, OpenSSL should already be included and the following instructions will work. For other server environments, you’ll need to refer to your own documentation.
Enter the following command in your command line, replacing “server” with your domain name so that there is no ambiguity later on. Make sure that you are located in the folder where you want your private key and CSR to be generated. It’s important that your private key is never in a publicly accessible folder.
openssl req -new -newkey rsa:2048 -nodes -keyout server.key -out server.csr
You will be prompted to enter in the information for your common name (the domain or domains), your two letter code country, your state or province, your locality or city, your organization, organization unit (or department), and your email address.
If you are unsure about any of these prompts, see the corresponding discussion for cPanel above. The fields serve the same purpose, and while the names may be slightly different, it should be immediately clear which prompt corresponds to which field.
Avoid leaving prompts blank, and include “NA” instead if the prompt does not apply, such as for the “Organization” and “Organizational Unit” prompts if you are only requesting a Domain Validation certificate.
After filling in all of the information, a .csr file and .key file will be generated in the folder that you run the command from. The .csr file is the CSR that you will need to give to your Certificate Authority when you buy your SSL certificate. Make sure that you have access to this when you buy your certificate. You can open the file with a text editor.
2. Buy An SSL Certificate And Link It To Your CSR
While you can generate an SSL certificate yourself and self-sign it, and Google may recognize this with a very minor boost to your SEO, self-signed SSL certificates do not appear professional, generate mildly frightening warnings in browsers, don’t do much for consumer trust, and likely are not recognized as especially important in determining search engine rankings.
It makes very little difference where you purchase your SSL certificate as long as the Certificate Authority is reasonably well known. Do not overpay. I will not recommend any specific Certificate Authority, but you should know that this is one market where price and quality are not at all related. SSL is just math, and the math doesn’t change based on where you buy your certificate.
In short, you should buy from a widely recognized Certificate Authority, but beyond that, price is not a factor.
The process for buying your SSL certificate should be pretty self-explanatory if you have bought anything online before, so there isn’t a whole lot to discuss here. There are only two main points to emphasize:
1. At some point during or after the checkout process, you will need to supply the CSR code you generated above. Your Certificate Authority won’t be able to generate a certificate without it. This part of the process is often referred to as “activating” your certificate.
2. You will be given a .crt file (usually of the form yourdomainname.crt) by the Certificate Authority. Like your CSR, this can be opened with a text editor, and you can copy the code from it. Make sure that you have access to this file or the code in it when you are installing SSL on your site.
3. Install Your SSL Certificate
Now that you’ve bought an SSL certificate, you need to install it on your servers. Here’s how to do that, from cPanel, and from the command line.
Install Your Certificate Using cPanel
As before, I’m assuming you’re running Paper Lantern, but the process is nearly identical if you’re running the Legacy theme. Let’s get started.
1. Log into cPanel with your username and password.2. Scroll to the “Security” section.
2. Scroll to the “Security” section.
3. Click on the “SSL/TLS” icon, as before.
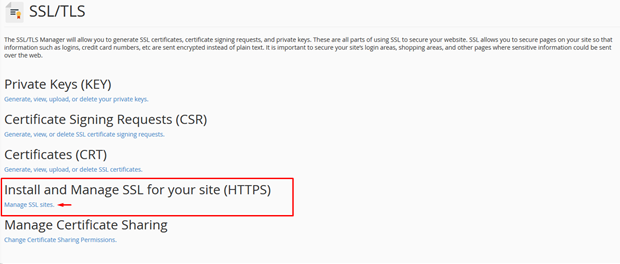
4. Go to the “Install and Manage SSL for your site (HTTPS)” heading.
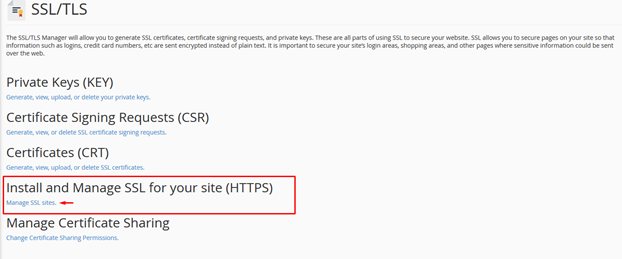
5. Click the “Manage SSL sites” link.
6. Copy the certificate code that your Certificate Authority gave you. It will be located inside of your .crt file, which you can open with a text editor. The code will start with “—–BEGIN CERTIFICATE—–“ and end with “—–END CERTIFICATE—–“ Copy all of the code, including these beginning and ending tags.
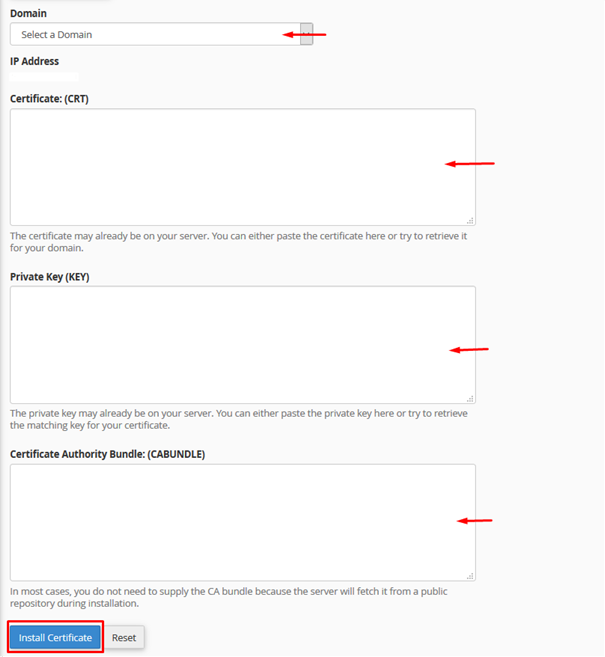
7. Paste your certificate code into the “Certificate: (CRT)” field.
8. Try clicking the “Autofill by Certificate” button. This will attempt to automatically locate your CSR and Private Key files that you previously generated, and use them to populate those fields automatically.
9. If the button fails, select your domain from the “Domain” drop down menu.
10. Also if the button fails, you will need to retrieve your Private Key. To get it, go back to the SSL/TLS Manager and click on the “Generate, view, upload, or delete your private keys” link under the “Private Keys (Key)” heading. You can find and copy your private key here, then return to the “Manage SSL sites” page and paste your private key code.
11. The “Certificate Authority Bundle: (CABUNDLE)” field should automatically populate. If not, you should be able to retrieve this information from your Certificate Authority.
12. If you plan to use secured e-mail on your domain, make sure the “Enable SNI for Mail Services” checkbox is checked.
13. Click the “Install Certificate” button.
14. It’s very important to verify if the SSL certificate has been installed properly on your server. SSL Shopper has a quick and easy SSL Checker tool that helps you tick off the essentials of your SSL certificate.
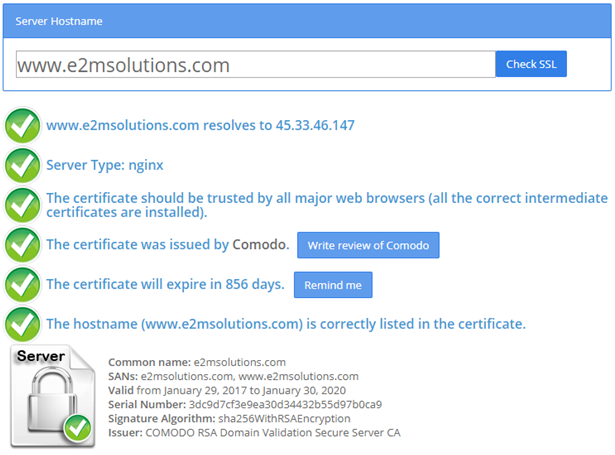
In the example above, E2MSolutions.com has passed all the tests. If there are any issues with your certificate, you’ll see a red cross next to it indicating the problem.
SSL should now be installed and functioning on your site. Try visiting your site with an “https://” at the beginning instead of “http://”. If the site loads and does not throw a scary browser error, your SSL certificate has been correctly installed.
Careful! You’re not done yet. You will still need to configure Magento to work with SSL and only SSL, which we’ll be talking about next.
Install Your Certificate From The Server Command Line
If you’re installing SSL from the server command line instead of cPanel, here is what you will need to do. Note that I’m assuming you’re running an Apache server environment. You will need to use your own documentation if you are running a different environment. Do not attempt to do this if you aren’t familiar with your server environment and the command line.
1. Navigate to the folder where your CSR and Private Key were generated.
2. Upload your certificate file. This is the .crt file your Certificate Authority should have sent you.
3. Your Certificate Authority should have also given you a Certificate Authority bundle. This is usually a .ca-bundle file. It may also be split into three separate .crt files. Upload your Certificate Authority bundle.
4. If you have multiple certificates, combine the code into a single .crt file. If your Certificate Authority bundle is not already bundled into a single file, combine them into a single .crt file as well.
5. You will need to edit your Apache VirtualHost file. The completed record will look something like this, with the filenames changed to reflect your own, of course:
Listen 443
<VirtualHost _default_:443>
DocumentRoot “/var/www”
ServerName *your_domain_name*
SSLEngine on
SSLCertificateFile “/ssl/*your_domain_name*.crt”
SSLCertificateKeyFile “/ssl/*your_private_key*.key”
SSLCACertificateFile “/ssl/bundle.crt”
</VirtualHost>
Keep in mind that you will need to do this separately for each domain if you have a wildcard or multiple domain certificate.
6. The changes will not take effect until you restart Apache. You can restart it with the following line:
sudo service apache2 reload
Now try loading your domain with an “https://” URL. If it loads and doesn’t produce any frightening browser warnings, your SSL certificate has been successfully installed.
As we mentioned in the cPanel section above, you’re not done yet! You will still need to configure Magento to work with SSL.
4. How To Configure Magento With SSL
Now that your SSL certificate is installed on your servers, you need to adjust the settings in Magento in order to make use of this fact. Here’s what you’ll need to do.
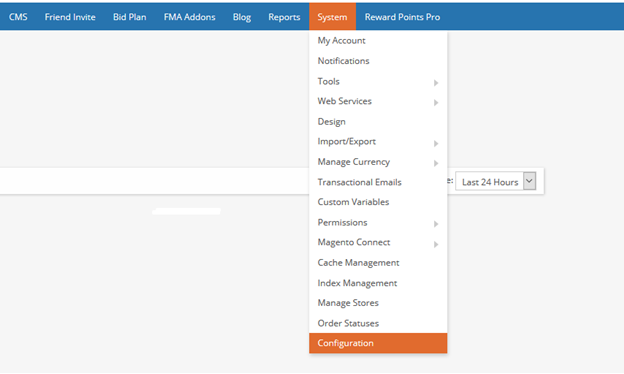
1. Log into the Magento Admin Panel with your username and password.
 2. Click on the “System” tab and then select “Configuration” from the drop down menu.
 3. In the left sidebar, go to the “General” drop down and select “Web.”
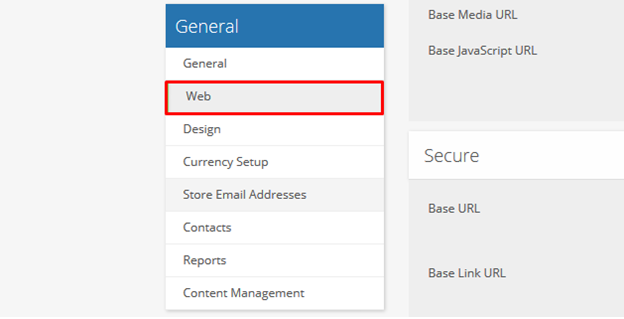
4. From the “Web” section, click the “Secure” section.
5. Change the “Base URL” field to include the “https://” version of your homepage.
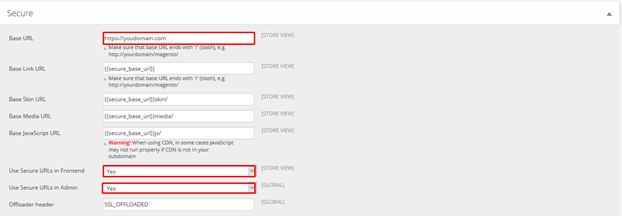
6. Set the “Use Secure URLs in Frontend” and “Use Secure URLs in Admin” drop down menus to “Yes.”
7. Click “Save Config.”
Your site should now be configured to use “https://” urls everywhere, not just on pages where users need to submit private information.
Try visiting your site with an “http://” URL. It should automatically redirect to the corresponding “https://” URL.
5. Set Up Redirects To Your HTTPS Pages
As you saw in the previous step, Magento automatically redirects pages to SSL when you configure it. Even so, you should set up your own redirects in order to reduce the load on Magento. In an apache environment, this is the code you will use (substituting your own URL structure, of course):
<VirtualHost *:80>
ServerName example.local
ServerAdmin [email protected]
<IfModule mod_rewrite.c>
RewriteEngine on
RewriteCond %{HTTPS} off
RewriteRule ^(.*)$ https://example.local/$1 [R=301,L]
</IfModule>
</VirtualHost>
In an Nginx environment, use this:
server {
listen 80;
server_name example.local;
location / {
return 301 https://example.local$request_uri;
}
}
You will need to reboot the server for these changes to take effect.
6. Look Out For Partially Encoded Content Warnings
Browsers might throw a partially encoded content warning after you’ve installed SSL. This happens if the content on your own servers is encoded, but assets loaded from other domains, like fonts, styles, pics, and javascript, are loaded using HTTP.
You can use Firefox to identify all of your off-site assets and find out which ones are using HTTP instead of HTTPS URLs.
Get Firefox and install Firebug.
Go to a page that is throwing the warning and open up Firebug, then go to the NET panel. When you hover your curser over each line it will show you the full URL of the asset. If the asset uses an HTTP URL instead of an HTTPS URL, it will cause your browser to throw the warning. You will need to replace or remove these assets with HTTPS assets.
In some cases, all you may need to do is change the URL to HTTPS. If the site in question has already installed SSL, this should resolve the problem. If the site doesn’t have SSL installed, you will need to replace it with a different asset in order to avoid throwing the browser warning and scaring off users.
7. Make Sure That All Of Your Internal Links Are Updated To HTTPS URLs
While Magento ideally does all of the heavy lifting here, it’s possible that some themes won’t catch every link, and links that you added yourself will likely not be automatically updated from HTTP to HTTPS URLs.
Why does it matter if the URLs will redirect anyway? For one, redirects put additional load on your servers that is completely unnecessary. This can potentially slow down your site, especially if users get caught in a redirect chain. Besides being frustrating for users, this can also negatively impact your search engine rankings.
More directly, Google has publicly stated that, like links, redirects are subject to a damping factor. This means that roughly 20 percent of your PageRank is lost every time a link passes through a redirect. This may not apply in all cases, but there’s no reason to leave this for the search engines and hope for the best.
To find any remaining HTTP links, we recommend using Screaming Frog. The free version of the tool is incredibly powerful and will be enough for our purposes here.
Finding Your HTTP Links With Screaming Frog
To find your HTTP links and replace them with HTTPS links in screaming frog:
1. Go to https://www.screamingfrog.co.uk/ and download and install Screaming Frog.
2. After opening Screaming Frog, paste your homepage URL into the “Enter url to spider” field, and press the “Start” button.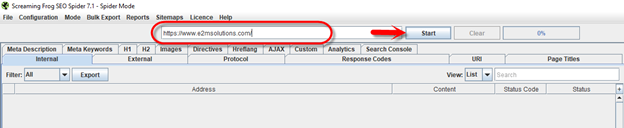
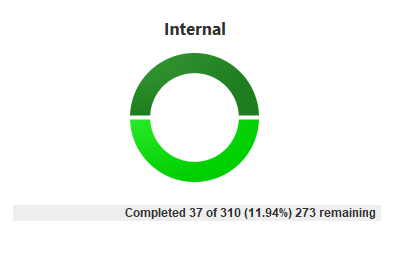
3. Screaming Frog will start crawling the URLs on your site. A progress bar to the right of the “Start” button will estimate how far through this process you are. Allow the progress bar to reach 100 percent before continuing. If your site is very large, this could take a while.
4. It also shows the exact number of pages it has found and crawled so far in the bottom right.
5. You should be in the “Internal” tab. (Click it if you aren’t.) The “Address” column lists all of the URLs that Screaming Frog could find by crawling your internal links and references.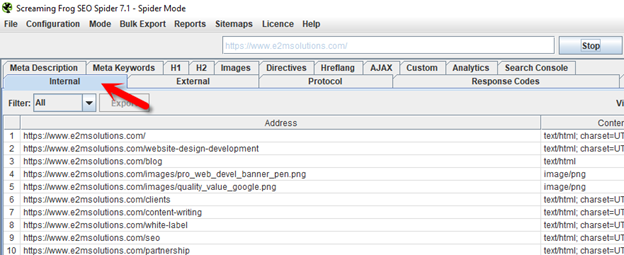
6. Click the “Address” column heading to sort it. This will sort your URLs so that any HTTP URLs discovered will be clumped together.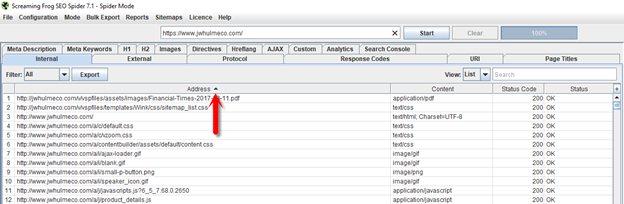
7. Click on the first HTTP URL in the list.
8. Look at the window at the bottom of the Screaming Frog interface, locate the “Inlinks” tab here, and click it.
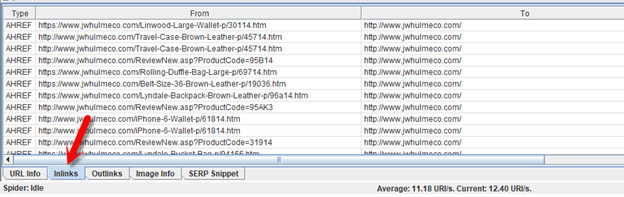
9. The bottom window now lists every page that links to this HTTP URL. The “FROM” column tells you what URL is linking the HTTP URL, and the “Anchor Text” column makes it easy for you to locate the link by telling you what text is located within it.
10. Use this information to update each link.
11. Run Screaming Frog again to make sure there are no remaining HTTP URLs.
This step is important, because it’s possible that any SEO benefit you get from switching to HTTPS will be lost to the redirect damping factor otherwise.
8. Check For Other References To Old HTTP URLs
In addition to links, you may also want to update any other references to old URLs in order to make sure they are all updated to HTTPS. Here are a few things to check:
1. Canonical Tags: It would be awfully embarrassing if all of your canonical tags pointed to out of date, redirected URLs, wouldn’t it? In Screaming Frog, go to the “Directives” tab and select “Canonical” from the “Filter” drop down menu. Sort the “Address” column to locate any HTTP URLs. If you find any, make sure these are updated.
2. XML Sitemap: Make sure that your XML Sitemap is updated to include only HTTPS URLs, and resubmit it to Google to ensure that it is up to date.
3. Update Your Google Search Console: Your HTTPS and HTTP sites are technically separate sites, and your old HTTP Google Search Console won’t tell you anything about what is happening with the HTTPS site. You will need to add it as a new site to your Google Search Console for the HTTPS site to ensure you have access to this information.
4. Change Your Link Building Habits: In all future guest posts and other link building efforts, make sure that you are linking to the HTTPS version of your site.
5. Update robots.txt: If your XML sitemap has a different name, make sure that this is reflected in your robots.txt file.
6. RSS: Make sure that your RSS feed works with HTTPS.
7. WWW vs non-WWW: The WWW and non-WWW versions of your site are technically different websites, just like the HTTP and HTTPS versions are technically different websites. Ideally, this should be done consistently, with all of your URLs using either WWW or non-WWW, and with redirects setup and internal links changed, just as with HTTPS. If for some reason this isn’t possible, make sure that HTTPS is working properly on both the WWW and non-WWW versions of the site. This would actually require a multiple domain or wildcard SSL certificate in order to work properly, so ensuring consistent WWW use is both important and ideal.
All Set
This guide should have armed you with nearly everything you’ll need to know in order to successfully run SSL on your Magento site. Now get out there and make it happen. Your users, and your rankings, will thank you.
7,112 total views, 1 views today